## How to Deep Clean Your Kitchen Appliances Quickly and Safely
The kitchen is often referred to as the heart of the home. It is where meals are prepared, families gather, and memories are made over shared plates. However, due to the high traffic and constant exposure to food splatters, steam, and grease, the kitchen is also one of the dirtiest rooms in any household. Over time, residues accumulate on your stovetop, inside your oven, on your refrigerator coils, and within your dishwasher filters. If left unchecked, this grime not only looks unsightly but can harbor bacteria, cause unpleasant odors, and reduce the efficiency of your costly equipment.
Deep cleaning your kitchen appliances does not have to involve harsh industrial chemicals or expensive professional services. With the right preparation, some eco-friendly materials, and a systematic approach, you can restore the sparkle and functionality of your appliances quickly and safely. This comprehensive guide walks you through every step of the process, ensuring you protect yourself from electrical hazards while preserving the longevity of your equipment.
Whether you are tackling a yearly spring cleaning project or simply want to maintain a hygienic cooking environment, understanding the correct procedures is essential. We will explore safety protocols, gather your toolkit, and dive into detailed routines for every major appliance. Let us transform your kitchen into a spotless sanctuary.
## 1. Safety First: Preparation and Pre-Cleaning Checks
Before you grab a sponge or mix your first cleaning solution, you must prioritize safety. Cleaning appliances involves a combination of electricity, water, heavy lifting, and potentially hot surfaces. Neglecting safety measures can lead to severe electric shocks, burns, or damage to your equipment. A meticulous preparation phase sets the tone for a successful deep clean.
### Unplugging All Appliances
The golden rule of appliance cleaning is simple but often overlooked: always disconnect power before starting. While it seems obvious for portable devices like blenders or toasters, stationary units like dishwashers and built-in microwaves pose a different risk. For movable appliances, pull the plug from the wall outlet. For fixed installations, locate your home's circuit breaker panel and switch off the dedicated circuit for that appliance. This eliminates the risk of accidental activation or current surges that could happen if water drips onto internal wiring.
Do not rely solely on the appliance being turned off via its control panel. Mechanical switches can fail or be toggled by pets or children. Physical disconnection guarantees zero electrical flow to the device during your work.
### Ventilation and Air Quality
Cleaning often generates fumes, whether from cleaning agents you are applying or dust stirred up from the appliance interiors. Ensure the area is well-ventilated before starting any tasks. Open windows near the kitchen to allow fresh air to circulate and stale air to escape. Turn on your range hood fan if you are cleaning the cooktop area, even without the burners running, to help pull airborne particles away from your breathing zone.
If you plan to use strong scented products (even natural ones like concentrated vinegar), wearing a mask can provide an extra layer of protection. Although we advocate for non-toxic solutions here, inhaling excessive aerosols from dust or debris kicked up from the coils or filters is unhealthy.
### Cooling Down Periods
Never attempt to clean a hot appliance immediately after use. Ovens and stovetops retain heat long after they are switched off. Touching metal racks or heating elements that are still warm can cause painful burns. Wait at least an hour after usage for the components to cool to a safe touch temperature. Similarly, if you are dealing with a dishwasher or microwave that has been in use, allow them to settle. Hot glass or plastic parts can crack if exposed suddenly to cold cleaning water.
### Personal Protective Equipment (PPE)
Invest in basic protective gear. Waterproof rubber gloves are essential. They prevent skin irritation from lingering grease, protect against minor cuts from sharp utensils left in sinks, and stop you from absorbing cleaning agents through your hands. Wear old clothes or an apron that you do not mind staining. Cleaning often results in splashes, especially when scrubbing dirty areas. Finally, remove jewelry such as rings and bracelets before you begin to avoid trapping moisture against your skin or getting caught on moving parts.
## 2. Essential Tools and Non-Toxic Cleaning Solutions
Modern kitchens offer countless specialized products, many of which contain harsh solvents and volatile organic compounds (VOCs). These can be detrimental to both human health and the environment. Instead, you can achieve superior results using common household ingredients and soft tools designed to grip dirt without scratching. Building the right kit beforehand saves time and ensures consistency throughout the cleaning marathon.
### Microfiber Cloths
Nothing beats microfiber for general cleaning. Unlike cotton rags, microfiber is engineered with split fibers that trap dust, grease, and liquids rather than just pushing them around. Buy several packs in neutral colors. White cloths help you see what dirt you are picking up, while blue or green cloths are designated for specific zones (e.g., stainless steel vs. glass). Avoid paper towels, as they tend to shred and leave lint behind, which can ruin the finish on polished surfaces.
### White Vinegar and Baking Soda
These two pantry staples form the backbone of a non-toxic cleaning arsenal. White vinegar is acidic, making it excellent for dissolving mineral deposits, hard water stains, and cutting through light grease. It also deodorizes effectively. Baking soda acts as a gentle abrasive and a neutralizer for odors. When combined, they create a fizzy reaction that helps lift stubborn particulate matter out of crevices. Mix three parts baking soda to one part water to create a thick paste for scrubbing tough spots. For daily mopping or wiping, a 50/50 mix of vinegar and water in a spray bottle serves as a powerful degreaser.
### Mild Dish Soap
For general degreasing tasks, specifically on glass and smooth plastics, a high-quality, mild liquid dish soap is indispensable. Look for formulas free of bleach or antibacterial additives that can strip protective coatings. Use warm water mixed with a few drops of this soap to wash removable parts like crisper drawers or shelves. The suds help emulsify fats, allowing them to rinse away cleanly without leaving a film.
### Soft-Bristle Brushes
A stiff wire brush is dangerous for modern appliance finishes, often causing micro-scratches that trap future dirt. Instead, gather a set of soft-bristle brushes. An old toothbrush is perfect for detailing corners, sealant ridges, and knobs. A small nylon scrub brush handles larger grates or filter cages. Silicone brushes are also available and are durable enough for scrubbing baked-on residue without damaging enamel or coating layers.
### Additional Accessories
- **Spatula:** A plastic putty knife or spatula helps scrape off large chunks of burnt food without gouging the surface underneath.
- **Bowls:** You will need several bowls for soaking removable parts.
- **Spray Bottles:** Label them clearly for vinegar solution, soap water, and oil polishes.
## 3. Deep Cleaning Routine for Major Appliances
Once you have your safety checks done and tools gathered, it is time to tackle the big machinery. Systematic cleaning ensures no area is missed. Work from top to bottom (microwave down to floor) or room-wide, depending on your layout. Here is the routine for the primary appliances found in most kitchens.
### Scrubbing the Stovetop and Burners
Gas or electric? Gas burners often drip food into the ports. Remove the grates and caps. Soak the cast iron or steel pieces in warm soapy water until softened. Scrape out debris from the burner heads with a straightened paperclip or needle to ensure flames remain even. Wipe the ceramic or enamel stovetop surface with the vinegar solution. For gas stoves, be careful not to push water into the igniter controls. Dry thoroughly to prevent rust on metal components.
### Interior of the Oven
This is often the most challenging task. Remove the oven racks first. Place them in the bathtub or a large sink with hot water and dish soap. Let them soak for at least an hour. Inside the oven, apply your baking soda paste to the walls and floor. Leave it overnight if the grime is bad; the enzyme activity will loosen carbonized food. In the morning, wipe it out with a damp microfiber cloth. For the glass door, place a mixture of vinegar and water in the bottom pan, turn the oven on to warm (but not bake) for 20 minutes, creating steam that loosens stuck-on debris. Polish the exterior with a dedicated stainless steel cleaner if applicable, following the grain direction.
### Refrigerator Coils and Seals
The back of your refrigerator is a magnet for dust bunnies. Dust on the coils forces the compressor to work harder, increasing energy bills and wear. Pull the unit out gently (unplugged!) and vacuum the coils using a brush attachment. Check the bottom grille area as well. Inside the fridge, discard expired foods. Wash shelves and drawers with the soap solution. Pay special attention to the rubber door gaskets (seals). Mold loves the dark crevices here. Wipe them down with vinegar to kill mold spores. Ensure they are dry before closing the doors to prevent sticking.
### Dishwasher Filter Cleaning
Many people forget the dishwasher filter until it smells. Located at the bottom of the tub under the spray arm, this filter catches food particles. Unscrew or unlock it according to your manual. Rinse it under running water to remove loose bits. Soak it in a bowl of warm soapy water with a splash of vinegar to dissolve grease. Use the soft brush to gently scrub mesh areas. While the filter is out, inspect the spray arms for clogged holes and clear them with a toothpick. Run an empty cycle with a cup of white vinegar placed upright on the top rack to sanitize the interior tubes and eliminate odors.
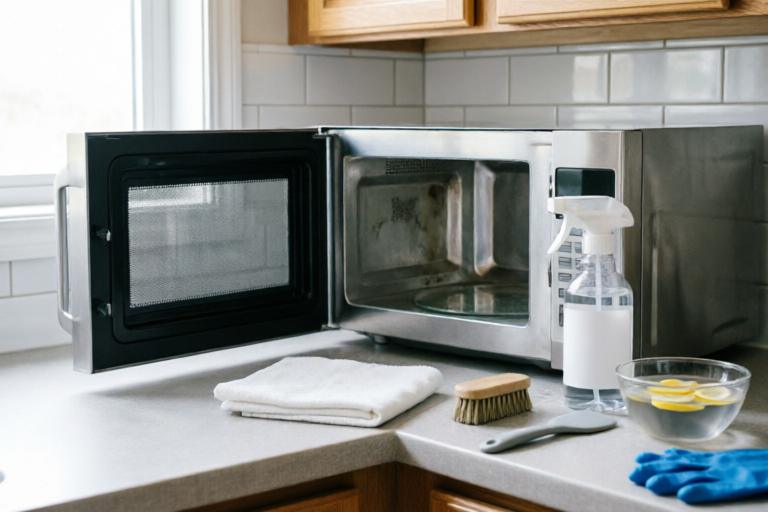
### Microwaves and Toasters
For microwaves, fill a microwave-safe bowl with water and half a lemon. Heat for five minutes. Do not open the door yet; let it steam for another five. The condensation melts the dried food. Simply wipe the interior with a cloth. Toasters collect crumbs inside. Turn them upside down over a trash can to shake out debris. Wipe the exterior with a damp cloth. Never submerge the toaster cord in water.
## 4. Tackling Stubborn Grime Without Damaging Surfaces
Sometimes regular cleaning isn't enough. Grease builds up over years, or sugar caramelizes into rock-hard deposits. Aggressive scraping can ruin stainless steel, chip enamel, or tear rubber seals. Knowing how to soften stubborn messes is key to preservation.
### The Soaking Technique
Heat helps loosen bonds. If you have burnt cheese on an oven tray, try wrapping it in aluminum foil soaked in warm water and letting it sit for thirty minutes. The trapped steam penetrates the crust. For toaster bread crusts, fill a bowl with hot soapy water and lay the parts in it (cordless accessories only) until pliable. Never force a hard piece off; patience prevents scratches.
### Gentle Abrasives
Steel wool is the enemy of modern finishes. Stick to pumice stones or nylon pads designed for cookware. If using baking soda paste, apply it generously and let it sit for ten minutes before rubbing in circular motions. The grit in baking soda provides friction but is softer than glass or enamel. Test a small patch in a hidden corner first to ensure no discoloration occurs.
### Protecting Rubber Seals
Rubber gaskets on fridge doors and dishwasher fronts degrade with harsh chemicals like bleach or ammonia. They become brittle and lose their airtight function. Always verify your cleaning product is safe for elastomers. Vinegar is generally safe, but oil-based polishes should be avoided on seals as they can attract dust and cause swelling. If a seal starts peeling, do not repair it with glue; order a replacement part from the manufacturer.
### Handling Stainless Steel Finishes
Stainless steel has a specific grain direction. Cleaning across the grain creates visible streaks and swirls. Always wipe parallel to the lines you feel with your finger. For fingerprints, a tiny drop of olive oil on a microfiber cloth buffed lightly along the grain restores shine and temporarily repels new marks. Do not use silicone sprays marketed as protectors frequently, as they build up sticky residue over time.
## 5. Final Wipe-Down and Maintenance Strategies
Cleaning is useless if the moisture remains to cause corrosion or mold growth. The final stage involves drying and establishing habits that keep the work from recurring too soon.
### Thorough Drying
Use a dry microfiber towel to go over every surface once again. Water spots on stainless steel and chrome are difficult to remove later. Pay close attention to drawer slides, knob bases, and under the handle grips. Trapped moisture leads to rust on hinges and screws. Ensure the dishwasher interior is dry before closing it; leaving the door ajar after the last load helps air dry and prevents mildew smells. Similarly, wipe out the fridge ice maker tray regularly.
### Establishing a Weekly Routine
You do not need to deep clean everything every week. Spread the labor. Dedicate Monday to wiping the exterior of the microwave. Tuesday night could be the stovetop. Wednesday might be the fridge shelves. By breaking it down, you prevent the overwhelming feeling of a massive chore. Keep a spray bottle of your vinegar solution next to the stove for immediate cleanup of splatters. Prompt removal prevents hardening.
### Proactive Prevention
Prevention is easier than cure. Place silicone mats under your slow cookers or stand mixers to catch leaks and oil drips on countertops. Use splatter screens when frying to minimize grease buildup on overhead cabinets. Wipe down the toaster crumb tray weekly. Schedule a full deep clean seasonally (every three to four months) to address hidden dirt like coil dust or internal pipes. Consistency reduces the intensity of future cleaning sessions.
### Long-Term Care
Keep a log of when you cleaned the filters or coils. Manufacturers specify intervals for part replacement. A clogged filter ruins efficiency faster than dirt alone. Track purchase dates for appliances to anticipate warranty expirations or needed replacements. A clean machine lasts longer. When you sell or move, presenting sparkling appliances increases property value perception.
### Conclusion
Maintaining a pristine kitchen requires knowledge, patience, and the right tools. By prioritizing safety through proper disconnection and ventilation, utilizing non-toxic solutions that protect the environment and your lungs, and following a structured deep cleaning routine, you ensure your kitchen remains a healthy space. Tackle stubborn grime gently to extend the life of your machines, and establish daily habits that reduce heavy lifting later.
Remember, the goal is not just aesthetics but hygiene and efficiency. A clean oven cooks more evenly, a clean fridge keeps food fresher, and a clean dishwasher runs quieter. Start your next weekend with confidence, knowing you have the guide to transform your kitchen back into a sparkling, safe haven for your family. Happy cleaning!
---
**Frequently Asked Questions**
**Q: Can I use bleach on my kitchen appliances?**
A: Generally, it is best to avoid bleach on stainless steel and rubber seals as it can cause corrosion or degradation. Stick to vinegar or mild soap for sensitive surfaces.
**Q: How often should I deep clean my oven?**
A: A monthly spot clean is recommended, with a thorough deep clean every three to six months depending on usage frequency.
**Q: What is the best way to clean a French Fry Oil Buildup?**
A: Degreasers containing citrus extracts work well on oil. Apply, let sit, and wipe. Avoid abrasive scouring pads that can scratch the coating.
**Q: Is it safe to clean the dishwasher with vinegar?**
A: Yes, running a cycle with white vinegar is safe for cleaning the interior. Just do not mix it with detergent during the same cycle.
**Q: Why does my fridge smell bad even after cleaning?**
A: Often, the smell is coming from the evaporator drain line. Pour a little bleach-free cleaner down the drain tube to flush out stagnation.