How to Clean Your Laptop Keyboard Thoroughly
Keep Your Laptop Keyboard Clean for Optimal Performance
Introduction: The Importance of Keeping Your Laptop Keyboard Clean
Maintaining a clean laptop keyboard is crucial for several reasons. A dirty keyboard can lead to various issues such as sticky keys, reduced typing speed, and even hardware malfunctions. Over time, dust, dirt, and crumbs accumulate between the keys, which can interfere with the functionality of your keyboard. In this article, we will walk you through the steps to thoroughly clean your laptop keyboard and provide tips on how to keep it clean longer.
Preparation: Gathering Necessary Tools and Materials
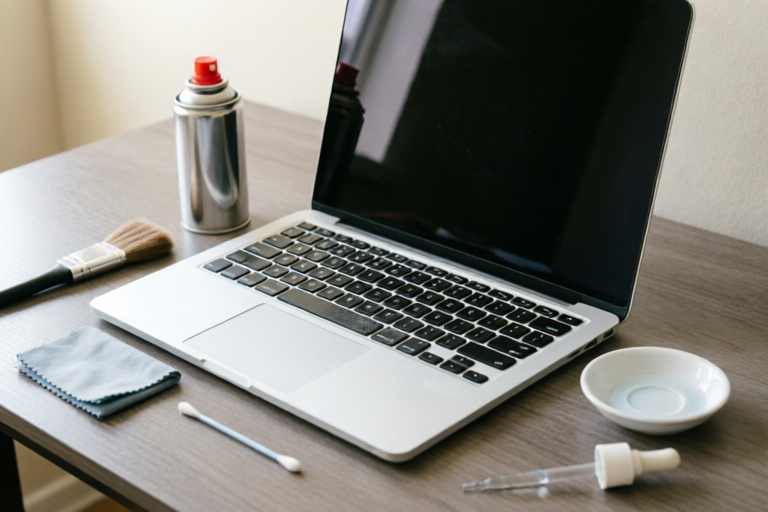
Before you start cleaning, gather the following tools:
- Compressed air: To blow away loose debris.
- Soft-bristled brush: For gently brushing between keys.
- Cotton swabs: To apply rubbing alcohol and clean individual key caps.
- Rubbing alcohol: To disinfect and remove stubborn stains.
- Damp cloth: For wiping down the surface of the keyboard.
Ensure your laptop is turned off and unplugged from all cables. If possible, remove the battery to avoid any accidental power surges during the cleaning process. This will help prevent any potential damage to your laptop's internal components.
Step-by-Step Cleaning Process
Step 1: Use Compressed Air to Blow Away Loose Debris
Start by using compressed air to blow away any loose debris, such as dust, crumbs, or hair, from the keyboard. Hold the can of compressed air upright and spray between the keys, being careful not to press too hard on the keys themselves. This step helps prevent small particles from getting lodged deeper into the keyboard.
Step 2: Gently Brush Between Keys with a Soft-Bristled Brush
Next, use a soft-bristled brush to gently brush between the keys. This will help dislodge any remaining particles that were not removed by the compressed air. Be gentle to avoid damaging the keys or the underlying circuitry.
Step 3: Apply Rubbing Alcohol on a Cotton Swab to Clean Individual Key Caps
For more thorough cleaning, apply a small amount of rubbing alcohol to a cotton swab and carefully clean each key cap. Gently rub the alcohol-soaked swab over the surface of the key caps to remove dirt, oil, and grime. Avoid applying too much alcohol, as it can seep under the keys and cause damage.
Step 4: Remove Key Caps if Necessary for Deeper Cleaning
If your keyboard has removable key caps, consider taking them off for a deeper clean. Most laptops have key caps that can be easily lifted off with a flathead screwdriver or a keycap puller. Once removed, clean the key caps individually using rubbing alcohol and a soft cloth. Allow them to dry completely before reattaching them.
Step 5: Wipe Down the Surface of the Keyboard with a Damp Cloth
Finally, wipe down the surface of the keyboard with a damp cloth. Slightly dampen the cloth with water, but ensure it is not overly wet. Wipe the surface of the keyboard gently, making sure not to let any moisture seep into the gaps between the keys or the ports. This will help remove any remaining dirt or smudges.
Preventive Measures: How to Keep Your Keyboard Clean Longer
To extend the cleanliness of your laptop keyboard, follow these preventive measures:
- Regular Maintenance: Clean your keyboard regularly to prevent dirt and debris from accumulating.
- Use Keyboard Covers: Consider using a keyboard cover or protector to shield your keyboard from spills and debris.
- Avoid Eating Near Your Laptop: Eating near your laptop increases the likelihood of crumbs falling into the keyboard.
- Proper Storage: When not in use, store your laptop in a clean, dry place to minimize exposure to dust and debris.
By implementing these preventive measures, you can significantly reduce the frequency of deep cleaning sessions and extend the lifespan of your keyboard.
Troubleshooting Common Issues After Cleaning
After cleaning your laptop keyboard, you may encounter some common issues. Here are some potential problems and their solutions:
Water Damage
If you accidentally introduce water into the keyboard during cleaning, immediately turn off the laptop and unplug it. Open the laptop and allow it to dry completely before attempting to use it again. You can place it in a bowl of uncooked rice overnight to absorb excess moisture.
Sticky Keys
Occasionally, after cleaning, you may experience sticky keys. This can happen if there is residual moisture or debris left behind. Re-clean the affected area using the steps outlined above, paying extra attention to the keys in question. Ensure that the keys are fully dry before testing them again.
Conclusion: Maintaining a Clean Keyboard for Optimal Performance
Maintaining a clean laptop keyboard is essential for optimal performance and longevity. Regular cleaning helps prevent issues like sticky keys, reduced typing speed, and hardware malfunctions. By following the steps outlined in this guide and implementing preventive measures, you can ensure that your laptop keyboard remains in top condition. Adopting good hygiene practices for your laptop will not only improve its functionality but also extend its lifespan. Happy cleaning!
Comments

This really helped. My typing speed has improved since cleaning the keyboard.

Instead of cotton swabs, I used microfiber cloths. They worked great too!

Super helpful. I always eat snacks while working, so this will definitely help keep things clean.

Is it safe to use rubbing alcohol on all types of keyboards? I have a newer model.
Worked for me. I also wiped the edges of the keys with a damp cloth, extra clean.

I tried this but my keys still feel sticky. Did I miss something?

Man, my laptop was a mess! Used the compressed air and brush, and now it's like new. Thanks!