Cooking & Kitchen
How to Deep Clean Your Oven Without Harsh Chemical Products
Sparkle Naturally, Cook Safely
## Introduction: Why Switch to Chemical-Free Oven Cleaning?
The modern kitchen is the heart of the home, a place where creativity, warmth, and sustenance converge. At the center of this hub sits the oven, working tirelessly to transform raw ingredients into meals that nourish our families. However, after months of use, that same appliance can become a stubborn reservoir of burnt-on grease, carbonized food particles, and grime that seems impervious to effort. Traditionally, homeowners have turned to commercial oven cleaners labeled with powerful warning symbols. These products rely on harsh chemicals like sodium hydroxide (lye) to cut through years of accumulation. While effective, these traditional solutions come with significant downsides.
First and foremost, there is the issue of health safety. The fumes from caustic oven cleaners can irritate the respiratory system, eyes, and skin. For households with children, pets, or individuals suffering from asthma and allergies, introducing these volatile organic compounds (VOCs) into the indoor air is a risk none should take lightly. Second, the cost-effectiveness of store-bought aerosol cleaners is questionable. A small bottle can cost upwards of ten dollars and only lasts for a few uses, whereas natural alternatives are incredibly cheap.
Finally, the environmental impact cannot be ignored. Commercial cleaners often end up in waterways after rinsing, affecting aquatic ecosystems. By switching to chemical-free oven cleaning, you not only protect your family’s health but also contribute to a sustainable lifestyle. This guide will walk you through a comprehensive process to deep clean your oven using nothing more than baking soda, vinegar, and lemon juice—ingredients already sitting in your pantry.
## Preparation: Gathering Supplies and Ensuring Safety
Before diving into the cleaning process, proper preparation is paramount. A methodical approach ensures efficiency and prevents accidents. Cleaning an oven is a job that requires patience rather than brute force, so setting the stage correctly will save you time and frustration later.
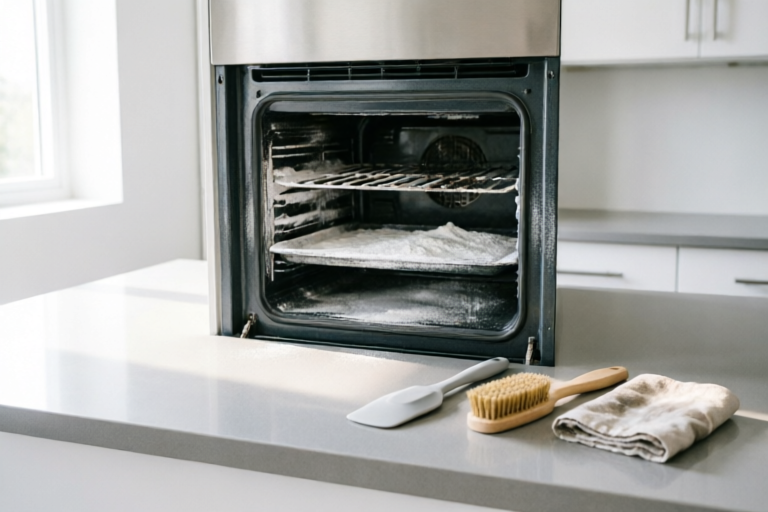
### Gathering Your Arsenal
You do not need expensive equipment to tackle a greasy oven. Most of the necessary tools are reusable household items. Here is the complete checklist:
- **Protective Gloves:** Even natural substances like baking soda can dry out the skin, and old baked-on grease is messy. Use rubber dishwashing gloves to keep your hands soft.
- **Microfiber Towels:** Unlike paper towels, microfiber traps dust and grease effectively without leaving lint behind. Have at least three distinct towels: one for applying cleaners, one for scrubbing, and one for final drying.
- **Non-Abrasive Sponge or Scrubber:** You want to avoid scratching the enamel interior of the oven. A soft sponge with a scouring side is ideal for tough spots, but start gentle.
- **Spray Bottle:** Essential for distributing the vinegar solution evenly across the walls.
- **Plastic Putty Knife or Old Credit Card:** This tool helps scrape off large chunks of hardened debris without damaging the heating elements or glass doors.
- **Bucket of Warm Water:** For rinsing your tools and wiping away residue.
- **Fan or Open Window:** Ventilation is key, even when using natural ingredients, to aid the drying process and disperse any lingering odors.
### Safety Steps Before Starting
Safety begins before you apply a drop of liquid. Ensure that the oven is completely cool. Do not attempt to clean an oven that has just finished cooking a roast. The residual heat can cause liquids to evaporate instantly upon contact, potentially creating steam burns or uneven cleaning results.
Next, disconnect the appliance if it is a plug-in unit under normal circumstances, though usually, turning off the power at the breaker is sufficient for electric models. Always wear your protective gloves to prevent irritation from accumulated grease which may harbor bacteria. Lay down newspapers or disposable cloths beneath the oven door to catch falling debris and dirty water, protecting your flooring from slip hazards.
If your oven has removable racks and trays, take them out. Place them in the bathtub or sink lined with a towel for separate soaking. Leaving them out allows better access to the bottom cavity and makes it easier to scrub the tracks and guides inside the oven itself.
## Creating Powerful Natural Cleaning Agents
Nature offers potent solvents that rival their synthetic counterparts. The science behind natural cleaning lies in the chemical reactions between alkaline substances and acids, along with the mild abrasiveness of powders. We will explore three primary recipes tailored for different levels of soilage.
### The Baking Soda Power Paste
This is the gold standard for heavy-duty oven cleaning. Baking soda (sodium bicarbonate) is a mild abrasive and an alkaline compound. Grease is acidic; when baking soda is applied, it neutralizes the acid, breaking the bond holding the grease to the metal surface. Over time, this loosens the carbon buildup.
**Ingredients:**
- Half a cup of baking soda powder.
- Approximately four tablespoons of warm water.
**Instructions:**
Mix the baking soda and warm water in a bowl until it forms a thick, spreadable paste similar to toothpaste consistency. If it is too runny, add more powder; if it is too crumbly, add more water. The goal is a coating that sticks to the vertical surfaces without dripping off prematurely. This paste is safe for all oven interiors except self-cleaning pyrolytic ovens, as the abrasive nature could damage specific seals over time (check your manual).
### The White Vinegar Solution
While baking soda scrubs, vinegar cleans and disinfects. White distilled vinegar contains acetic acid, which helps dissolve mineral deposits and cuts through grease that baking soda may have lifted. The combination of baking soda and vinegar creates a fizzing reaction that mechanically agitates dirt particles, helping to lift them away from the surface.
**Ingredients:**
- One cup of distilled white vinegar.
- One cup of warm water.
- (Optional) A few drops of essential oil like lemon or eucalyptus for fragrance.
**Instructions:**
Combine the vinegar and water in a spray bottle. Shake gently before each use. This solution is particularly useful for the final rinse stage and for maintaining the shine of stainless steel exteriors.
### The Citrus Boost
Lemon juice provides another layer of acidity and freshness. It is excellent for removing odors left behind by strong-smelling foods like fish or onions. Citrus peels steeped in vinegar for two weeks create a super-concentrated citrus-vinegar cleaner, but fresh lemon juice works perfectly fine in a pinch.
**Usage:**
Squeeze the juice of one lemon into warm water or mix it directly into your baking soda paste for a fragrant, enhanced cleaning power. This is especially effective for the glass window of the oven door, as the citric acid helps remove fingerprints and film without streaking.
## Execution: A Detailed Step-by-Step Step Guide
With your supplies gathered and cleaning agents prepared, it is time to execute the cleaning strategy. Patience is the most important tool here; rushing will yield poor results. Follow this chronological workflow for the deepest clean.
### Step 1: Empty and Prepare the Space
Remove all racks, shelves, and dividers. Inspect them individually. Soak the racks in hot, soapy water in your sink or bathtub. Allow them to soak for at least thirty minutes to soften the caked-on grease. Meanwhile, inspect the oven cavity. If there are large flakes of burnt food, use the plastic putty knife to gently scrape them off into the trash bag. Be careful not to scratch the enamel coating. Sweep loose crumbs into a dustpan to prevent them from turning into mud when your cleaning solution hits them.
### Step 2: Applying the Natural Cleaner
Dip your gloved hand or a dedicated cloth into your baking soda paste. Begin spreading it over the interior walls of the oven. Apply a generous layer, covering any areas with visible black or brown stains. Focus heavily on the corners and the area underneath the heating element, as these are usually the hardest-hit zones.
Avoid applying the paste directly onto the heating coils themselves; the moisture can cause potential issues when the element is reactivated. Instead, coat the surrounding tiles and the metal guards protecting the element. Use a brush to apply the paste around the edges and seals. You want every grimy surface covered in a thin white blanket.
For the glass door, you can apply the paste sparingly and then wipe it off once dried, or simply use a mixture of vinegar and water with a microfiber cloth for a streak-free shine. Some prefer to put a second layer of paste on the glass and wait longer for it to work.
### Step 3: The Waiting Game
This is the crucial step where most people fail—they want instant gratification. Once the paste is applied, turn the oven off. Close the oven door to trap moisture and allow the baking soda to penetrate deeply. Leave it to sit for at least twelve hours. Overnight is the ideal timeframe. During this period, the chemical reaction continues to break down the grease bonds. If you are in a rush, leave it for a minimum of two hours, but expect harder scrubbing afterward.
You will notice the paste changing color as it absorbs the oils. It may turn yellow or brown. This is a good sign; it indicates the cleaning agent is doing its work. If the paste dries out completely and becomes chalky before you return, lightly spritz it with a little water to reactivate it.
### Step 4: Scrubbing Techniques
When the waiting period ends, open the oven door. The grime should feel softer. Take your damp microfiber cloth or sponge and begin scrubbing. Start at the top and work downward to prevent drips from re-staining cleaned areas. Apply moderate pressure, focusing on the stained patches.
If you encounter stubborn spots that remain stuck, sprinkle a little extra dry baking soda directly onto the spot and scrub vigorously. The extra grit acts like sandpaper but safe for enamel. Do not forget the oven tracks where the rails slide; these often collect crumbs that cause the racks to stick. Use a small brush, like an old toothbrush, to get into those narrow crevices.
Once the bulk of the baking soda and grease sludge is removed, prepare the next phase. This involves neutralizing the alkalinity of the baking soda and lifting the remaining residues.
### Step 5: Rinsing and Drying
Fill your spray bottle with the white vinegar solution. Spray the entire interior generously. Watch as the paste fizzes. This bubbling action lifts the emulsified grease and neutralizes the pH balance of the oven surface. Wipe this mixture away immediately with a clean, damp microfiber towel. Repeat the spraying and wiping process several times until no white residue remains and the towels come back wet but not gray.
Rinse your sponge frequently in the bucket of warm water to ensure you aren't just smearing dirt around. Pay special attention to the bottom of the oven; this area collects the most fat and debris. Ensure you wipe down the rubber gaskets (door seals) as well, using a cotton swab or a folded corner of a cloth to clean the folds of the seal. Finally, take a dry towel and buff the interior until it is moisture-free. Moisture trapped inside can promote rust or mold growth during future use.
Now, handle the racks you soaked earlier. Scrub them with the same baking soda paste method or use a scouring pad if the racks are enameled. Rinse thoroughly and dry completely before placing them back inside. Do not put them back until the oven is absolutely bone-dry to prevent thermal shock to the racks when heated.
## Conclusion: Aftercare and Preventative Maintenance Tips
Cleaning the oven is an accomplishment, but maintaining that pristine condition is what saves you the trouble next time. Regular maintenance minimizes heavy grime buildup, making future deep cleans faster and easier.
### Long-Term Benefits
By adopting natural cleaning methods, you cultivate a healthier home environment. There is no lingering chemical taste in your food, reducing the risk of transferring toxins during high-heat cooking. Furthermore, the habit of using inexpensive pantry staples reduces household waste and lowers your grocery bill over time. You gain control over the quality of products touching the surfaces that cook your meals.
### Daily and Weekly Habits
To prevent grease accumulation, consider the following preventative habits:
- **Use Foil Lining:** Line the bottom of the oven with aluminum foil placed below the lowest rack (never directly on the heating element) to catch drips. Change it weekly. This simple trick stops sauce splatters from hardening onto the floor.
- **Immediate Wiping:** If something boils over or spills during cooking, wait for the oven to cool enough to touch, then wipe the spill immediately while it is still soft. Wet wipes designed for kitchens can be used, but be careful with bleach ones near enamel.
- **Steam Clean:** Once a week, boil a pot of water with lemon slices in the microwave or oven on a low temperature. Open the door and let the steam sit for ten minutes. The condensation will soften light splatters, making a quick wipe-down sufficient.
- **Ventilation:** Always use the range hood fan while cooking to expel grease particles into the filter rather than letting them settle on the oven exterior.
In conclusion, deep cleaning your oven without harsh chemicals is entirely achievable with a bit of elbow grease and the right natural ingredients. This method empowers you to maintain a spotless kitchen space responsibly. Embrace the rhythm of the baking soda and vinegar dance in your kitchen, and enjoy the peace of mind that comes from cooking with purity and confidence. Your oven will thank you, and so will your family.
Comments

CleanSweep
super helpful guide! wish i had known about the lemon trick sooner
👍 19👎 0

PatiencePaysOff
my oven was so greasy i had to repeat step 4 twice. results came out good tho
👍 12👎 0
SaltIsLife
pro tip add salt to the paste makes it scrub way better on burnt bits
👍 5👎 0

MomOfTw0
Great article finally something safe for my house! Can't smell chemicals around the baby anymore
👍 18👎 0
GlassDoorProblem
The paste worked great except on the door glass. Had to spray extra vinegar on there separately.
👍 22👎 0

GreenDad123
Does the baking soda react too much when mixing with vinegar? Mine fizzed up crazy and I lost half my paste lol
👍 19👎 0

BakeItFresh
literally saved my hands doing this instead of those toxic fumes lol. took like 4 hrs total but totally worth it
👍 14👎 0