How to Fix a Leaky Faucet at Home Quickly
DIY Plumbing Solutions for a Leak-Free Home
Introduction
A leaky faucet can be more than just an annoyance; it's also a waste of water and money. According to the U.S. Environmental Protection Agency (EPA), a single dripping faucet can waste up to 3,000 gallons of water per year. Promptly addressing leaks not only helps conserve water but also prevents potential damage to your home. In this article, we'll walk you through the steps to fix a leaky faucet at home quickly and efficiently.
Identifying the Type of Faucet
Before you begin any repairs, it's important to know what type of faucet you're dealing with. There are several common types:
- Compression Faucets: These are older models that use a pair of washers to control water flow.
- Ball Faucets: They feature a rotating ball inside the valve body that controls water flow.
- Cartridge Faucets: These use a replaceable cartridge to control water flow.
- Dual-Handle Compression Faucets: Similar to compression faucets but with separate handles for hot and cold water.
- Single-Handle Ball Faucets: These use a single lever to control both temperature and water flow.
To identify the type of faucet you have, look at the handle design and the number of handles. You may also need to remove the handle to see the internal mechanism. Knowing the type of faucet is crucial because different types require different repair methods.
Gathering Necessary Tools and Materials
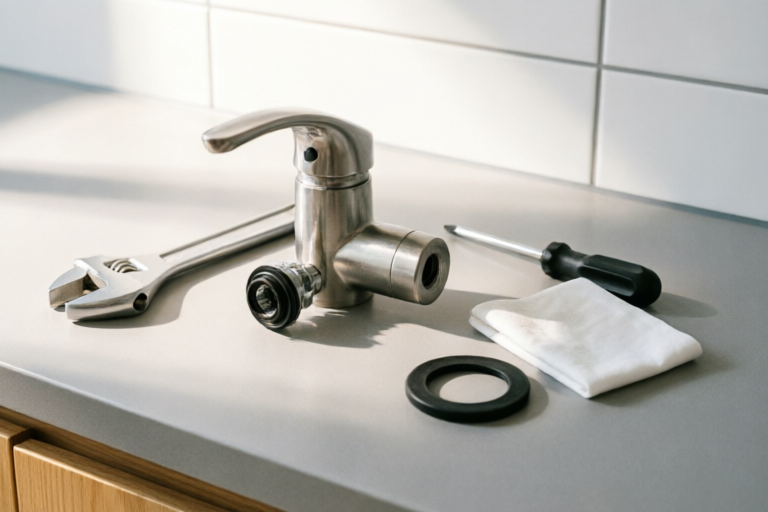
To fix a leaky faucet, you'll need some basic tools and replacement parts. Here’s a list of essentials:
- Adjustable wrench: For loosening nuts and bolts.
- Screwdriver: For removing screws from the handle and trim.
- Replacement parts: Depending on the type of faucet, you may need new O-rings, washers, or cartridges. These can usually be found at hardware stores or online retailers.
- Plumber's tape: Helps create a watertight seal when reassembling the faucet.
If you don't already own these tools, they can be purchased at most hardware stores or online. It's a good idea to buy extra replacement parts in case you need them later.
Steps to Fixing the Leak
Step 1: Turn Off the Water Supply
Before you start working on the faucet, make sure to turn off the water supply. Look for the shut-off valves under the sink and turn them clockwise to close. If you can't find shut-off valves, you may need to turn off the main water supply to your home.
Step 2: Remove the Handle and Trim
Use a screwdriver to remove the screw holding the handle in place. Once the screw is removed, gently pull the handle away from the faucet. Be careful not to damage the trim around the faucet. Some faucets may have decorative caps that need to be unscrewed before you can access the handle.
Step 3: Inspect and Replace Faulty Parts
Once you've removed the handle, inspect the internal components for signs of wear or damage. Common issues include worn-out washers, O-rings, or a faulty cartridge. Replace any damaged parts with new ones. Make sure to match the size and type of the replacement part with the original.
Step 4: Reassemble the Faucet
After replacing the faulty parts, reassemble the faucet by reversing the disassembly process. Apply plumber's tape to the threads of the stem to ensure a tight seal. Reinstall the handle and trim, making sure everything is securely fastened. Finally, turn on the water supply and check for leaks.
Preventive Maintenance Tips
Regular inspection and cleaning of your faucet can help prevent leaks and extend its lifespan. Here are some tips:
- Check for leaks regularly: Pay attention to drips or unusual noises coming from the faucet.
- Clean the aerator: The aerator is the small screen at the end of the faucet. Over time, it can become clogged with debris, affecting water flow. Remove and clean it periodically.
- Apply lubricant: A little silicone-based lubricant applied to the O-rings and washers can help prevent sticking and improve performance.
- Replace parts proactively: If you notice signs of wear, such as squeaking or difficulty turning the handle, consider replacing the affected parts before they cause a leak.
Conclusion
Fixing a leaky faucet is a manageable task that can save you money and water. By following the steps outlined in this article, you can address leaks quickly and efficiently. Remember, regular maintenance is key to keeping your faucet in top condition. If you're unsure about any step or need further assistance, consult a professional plumber. Happy fixing!
Comments

Thanks for the detailed steps. Added some WD-40 before reassembling and it's been perfect ever since!

Tried it and it didn't work. Maybe my faucet is a different type?

Just wondering, does this work for both compression and ball faucets?

The preventive maintenance tips were super helpful. Now I know how to keep my faucet running smoothly for years.

I used this guide and saved $70 on a plumber. Love it!

This was my first time fixing anything at home. It took a bit longer than expected but totally worth it!

Great guide! Quick question though, for step 3, do I really need a wrench or can I use pliers?

Worked like a charm! Turned off the water, replaced the washer, and it's as good as new. Saved me a ton of cash.