How to Fix a Leaky Faucet Easily at Home
DIY Plumbing Solutions for Every Homeowner
Introduction to Fixing a Leaky Faucet
Faucet leaks are a common household issue that can lead to significant water waste and increased utility bills. Addressing these leaks promptly not only helps you save money but also prevents potential damage to your home's plumbing system. In this guide, we will walk you through the steps to fix a leaky faucet easily at home.
Understanding the Common Causes of Faucet Leaks
Faucet leaks can be caused by several factors, including worn-out washers, damaged O-rings, or faulty internal mechanisms. Identifying the root cause of the leak is crucial for effective repairs. Regular maintenance can help extend the lifespan of your faucet and reduce the likelihood of leaks.
The Importance of Addressing Leaks Promptly
Ignoring a leaky faucet can result in more serious problems over time. Not only does it increase your water bill, but it can also lead to water damage in your home. By fixing the leak early, you can avoid these issues and maintain the integrity of your plumbing system.
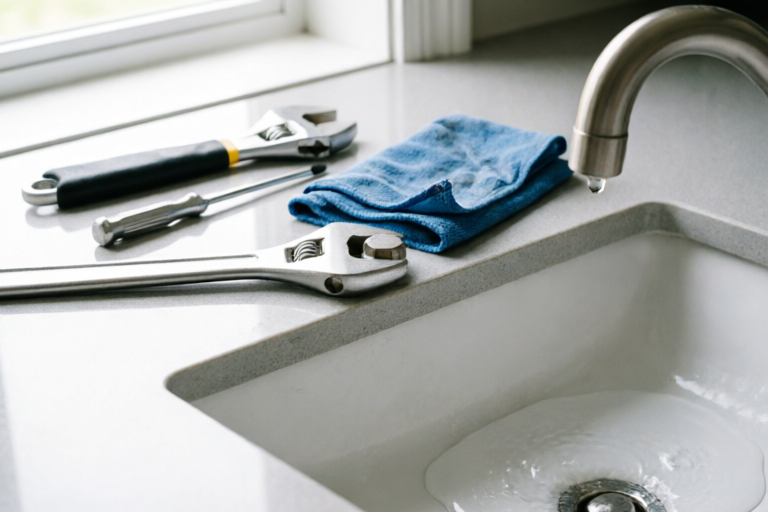
Tools and Materials Needed for Basic Repairs
- Adjustable wrench
- Phillips and flathead screwdrivers
- Replacement washers and O-rings
- Teflon tape
- Pliers
- Screwdriver set
Having these tools readily available will make the repair process smoother and more efficient.
Identifying the Type of Faucet
Before you begin any repairs, it’s important to identify the type of faucet you have. Different types of faucets require different repair methods, so knowing which one you're dealing with is key.
Differentiating Between Compression, Ball, Cartridge, and Ceramic-Disk Faucets
- Compression Faucets: These older models use two separate handles, one for hot and one for cold water. They rely on washers to control the flow of water.
- Ball Faucets: Featuring a single handle, ball faucets have a rotating ball inside that controls both temperature and flow.
- Cartridge Faucets: These faucets have a cylindrical cartridge that regulates water flow. They are often found in kitchens and bathrooms.
- Ceramic-Disk Faucets: Known for their durability, these faucets use disks stacked together to control water flow.
How to Determine Your Faucet Type Before Starting Repairs
Look at the handles and internal mechanism of your faucet to determine its type. If you're unsure, consult the manufacturer’s documentation or contact a professional plumber for assistance.
Shutting Off Water Supply and Preparing the Work Area
Before you start disassembling your faucet, ensure that the water supply is turned off to prevent any accidental water leakage.
Steps to Safely Turn Off Water Supply to the Faucet
- Locate the shut-off valves under the sink.
- Turn the valves clockwise to close them.
- Open the faucet to drain any remaining water from the pipes.
This ensures that there won't be any water pressure while you work on the faucet.
Draining the Pipes to Avoid Water Splashing During Repair
After turning off the water supply, open the faucet to allow any remaining water in the pipes to drain out. This step is essential to prevent water from splashing when you start disassembling the faucet.
Disassembling the Faucet
Once the water supply is off and the pipes are drained, you can begin disassembling the faucet. This involves removing the handles and decorative caps to access the internal components.
Removing Handles and Decorative Caps
Use an appropriate screwdriver to remove the screws holding the handles in place. Once the handles are removed, you can take off any decorative caps or escutcheons covering the valve stems.
Identifying and Removing Faulty Parts Such as Washers or O-Rings
Inspect the internal components for signs of wear and tear. Common faulty parts include worn-out washers, damaged O-rings, or broken cartridges. Use pliers or a wrench to remove these parts carefully.
Replacing Faulty Parts and Reassembling the Faucet
Once you've identified and removed the faulty parts, it's time to replace them with new ones. Ensure that you purchase the correct replacement parts for your specific faucet type.
Detailed Instructions on Replacing Worn-Out Components
- Washers: Remove the old washer and replace it with a new one of the same size.
- O-Rings: Carefully remove the old O-ring and install a new one, ensuring it fits snugly around the valve stem.
- Cartridges: For cartridge faucets, remove the old cartridge and insert a new one, aligning it properly with the valve body.
Follow the manufacturer’s guidelines for each part to ensure proper installation.
Ensuring Proper Reassembly to Prevent Future Leaks
After replacing the faulty parts, reassemble the faucet in reverse order. Tighten all screws and handles securely, but avoid overtightening to prevent damage. Test the faucet for smooth operation before turning the water supply back on.
Testing the Repair and Final Tips
Once the faucet is reassembled, turn the water supply back on and check for any leaks. If everything is functioning correctly, your faucet should now be fixed.
Turning On Water Supply and Checking for Leaks
Slowly turn the shut-off valves counterclockwise to reopen the water supply. Open the faucet and inspect for any leaks around the base or handles. If you notice any drips, repeat the repair process or consult a professional.
Additional Tips for Maintaining Your Faucet and Preventing Future Issues
- Regularly clean the aerator to prevent mineral buildup.
- Apply plumber's grease to moving parts for smoother operation.
- Check for leaks periodically and address any issues immediately.
Maintaining your faucet properly can extend its lifespan and reduce the frequency of repairs.
Conclusion: When to Call a Professional
While many faucet repairs can be done at home, there are times when professional help is necessary. Look out for signs such as persistent leaks, unusual noises, or difficulty turning the handles. Regular maintenance can help prevent costly repairs and ensure your plumbing system remains in good condition.
Comments

Regular checks are key. Preventive care saves money in the long run.

This helped me fix my compression faucet. Ball and cartridge types seem more complicated though.

I suggest adding a section on how to use a torque wrench to tighten the nuts without overdoing it.

Saved me a trip to the plumber. Super helpful!

Great tutorial! I used this to replace my old washer. Any tips on finding the right size for different faucets?
I'm confused about step 4. Did you mean to say remove the handle first or the cap?

Worked like a charm! Finally got rid of that annoying drip. Thanks for the detailed guide!