DIY & Repairs
How to Fix a Leaking Faucet Quickly and Easily
Quench the Drip, Save Your Wallet
## Introduction: The High Cost of a Dripping Faucet
A constant, rhythmic drip echoing through your kitchen or bathroom can be the soundtrack of annoyance for many homeowners. While it may seem like a minor nuisance at first glance, ignoring a leaking faucet is akin to throwing money down the drain—literally. Beyond the psychological irritant of the sound, a slow leak consumes significant amounts of clean water over time, impacting both your utility bills and the environment. On average, a faucet leaking at a rate of one drip per second can waste over 3,000 gallons of water annually. That is a staggering amount of resources squandered.
Fortunately, in the majority of cases, repairing a leaking faucet does not require the services of a professional plumber, nor does it demand expensive equipment. It is one of the most accessible do-it-yourself (DIY) projects for any homeowner. By understanding the basic mechanics behind a faucet and following a systematic approach, you can restore functionality, eliminate the noise, and reduce water wastage in a matter of hours. This comprehensive guide will walk you through every stage of the process, from gathering the right tools to performing post-repair testing. We will cover various types of faucet mechanisms, common pitfalls, and advanced tips to ensure your repair lasts.
Whether you are dealing with a dripping spout, moisture seeping from the base of the handle, or a stubborn issue that has persisted despite previous attempts, this guide is designed to equip you with the knowledge needed to solve the problem effectively. Let us delve into the world of plumbing basics and transform that annoying drip into silence.
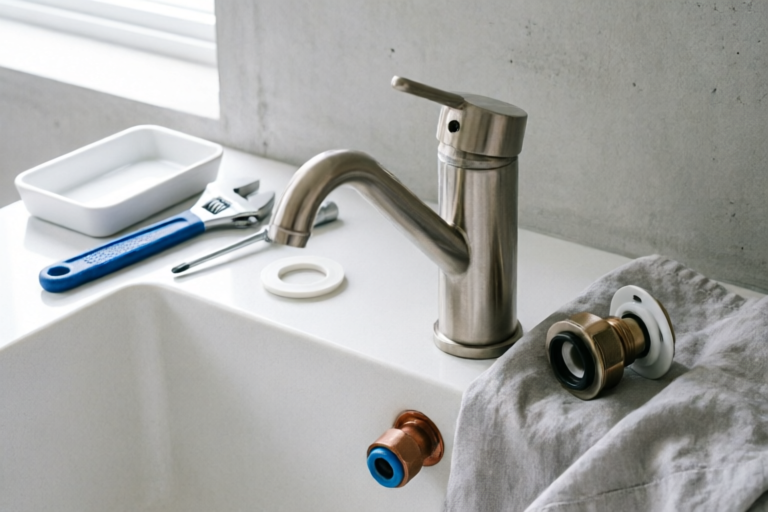
## 1. Gather Required Tools and Prepare the Workspace
Before turning a single wrench or screwing in a fastener, preparation is the cornerstone of a successful plumbing project. Rushing into the repair without adequate supplies is a recipe for frustration, potentially leading to damage to the fixture or injury to yourself. A well-prepared workspace also minimizes the mess associated with water leaks and disassembly.
### Essential Tools List
To tackle most residential faucet repairs, you will need a specific set of hand tools. Having these items on hand beforehand ensures that you won’t have to stop mid-project to drive to the hardware store.
- **Adjustable Wrench:** One versatile wrench capable of gripping fittings of various sizes is invaluable. A 10-inch adjustable wrench is generally sufficient for standard sink connections.
- **Slotted and Phillips Screwdrivers:** Faucet handles are typically secured with visible or hidden screws. You will need both flat-head (slotted) and cross-head (Phillips) drivers in various sizes. Some modern faucets utilize hex bolts rather than traditional screws.
- **Allen Wrench Set (Hex Keys):** Many manufacturers now use internal hexagonal setscrews located beneath a decorative cap on the faucet handle. A compact set of metric and imperial Allen wrenches covers this requirement.
- **Pliers:** Needle-nose pliers are excellent for reaching small parts deep inside the faucet body or holding small pins. Slip-joint pliers can be used for general grip but require care to avoid scratching chrome finishes.
- **Flashlight or Headlamp:** Plumbing spaces under the sink are notoriously dark. Proper lighting is crucial for identifying small O-rings and inspecting threads.
- **Bucket or Towel:** Even after shutting off the water, residual moisture remains in the pipes. Place a bucket or thick towels underneath the P-trap to catch any draining water and protect your cabinetry finish.
- **Plumbing Putty or Silicone Sealant:** Depending on the type of faucet, you may need to reseal the base to ensure a watertight bond against the countertop.
- **Penetrating Oil (e.g., WD-40):** Old screws and nuts often rust and seize. A spray of penetrating oil can loosen them before forcing them apart.
- **Replacement Parts Kit:** Never reuse old worn-out seals blindly. Purchase a generic faucet repair kit or specific OEM parts identified in later steps.
### Understanding Your Faucet Type
Identifying the type of faucet you own is critical before disassembly. There are four primary types, each with unique internal mechanisms:
1. **Compression Faucets:** These are the oldest style, featuring separate hot and cold handles that press down onto stems. They rely on rubber washers to seal the water flow.
2. **Ball Faucets:** Common in kitchens, these have a single dome-shaped cover controlling both temperature and volume via a rotating ball mechanism.
3. **Cartridge Faucets:** Using a cylindrical plug that moves up and down to regulate flow, these are found in both single-handle and dual-handle setups.
4. **Ceramic-Disk Faucets:** Featuring two ceramic discs under the handle, these are durable and rarely leak internally unless debris accumulates.
Knowing which type you have dictates which specific tools and parts you will need. Consult the manufacturer’s manual if available, or inspect the visual cues of the handle movement.
## 2. Shut Off the Water Supply and Drain Remaining Water
The most critical step in any plumbing repair is stopping the water source. Neglecting this can result in flooding, which causes far more damage than a dry faucet ever could. Do not attempt to dismantle the faucet while water pressure is active in the line.
### Locating the Shutoff Valves
Beneath most bathroom vanities and kitchen sinks, there are small valve handles connecting the supply lines from the wall or floor to the faucet. These are known as shutoff valves.
- **Turn Clockwise:** Locate the hot (usually red indicator) and cold (blue indicator) valves. Turn them clockwise until they stop completely. Avoid over-tightening, as this can strip the threads on aging valves.
- **Handle Positions:** If the valve has a lever handle, rotate it perpendicular to the pipe flow to stop water. If it has a round knob, use your hands or an adjustable wrench gently.
### What to Do If No Shutoff Valves Exist
In older homes or unique installations, you might find that the sink lacks individual shutoff valves. If this is the case, you must shut off the main water supply to the entire house. This is less convenient as it affects all fixtures and appliances. Look for the main water meter, typically located outside the house near the street or in the basement/utility room, and turn the main gate valve to the closed position.
### Draining the Residual Pressure
Even after closing the shutoff valves, water trapped in the pipes directly above the faucet will remain. To relieve this pressure and prevent spills:
1. Open the faucet handles to the hot and cold positions fully.
2. Allow the water to run until it stops flowing completely.
3. This action drains the remaining water from the supply lines connecting to the faucet, ensuring the area under the sink stays relatively dry during disassembly.
Place a rag or sponge into the pop-up drain stopper if you are repairing a bathroom sink; this prevents small screws or O-rings from accidentally falling down the drain and becoming impossible to retrieve.
## 3. Disassemble the Faucet to Access Internal Parts
With the water turned off and the area prepped, you can now begin the delicate process of opening the faucet. Proceed with caution to avoid stripping screws or damaging visible chrome surfaces.
### Removing the Handle
The handle is your entry point to the internal mechanism. Styles vary widely:
- **Exposed Screws:** Some handles have a screw visible on top or side. Remove this with the appropriate screwdriver. Pull the handle straight off the stem.
- **Concealed Caps:** Decorative caps labeled "Hot" or "Cold" often hide the securing screw. Gently pry these caps off using a flat-head screwdriver or a knife tip, ensuring not to scratch the metal finish. Once removed, unscrew the bolt underneath.
- **Set Screws:** Others use an Allen key. Insert the tool into the hole on the underside of the handle and turn counter-clockwise to release tension.
### Detaching the Cover and Retaining Nut
Once the handle is removed, you will likely see a decorative cap or nut securing the internal cartridge or assembly. Use channel-lock pliers or an adjustable wrench to loosen this nut. Grip the nut firmly but evenly to avoid rounding off the corners.
### Extracting the Cartridge or Stem
This is the core component where the magic (and the leak) occurs. For cartridge faucets, pull the cartridge out gently. If it is stuck due to mineral deposits, wiggle it back and forth rather than pulling straight up, which could snap the housing. For compression faucets, unscrew the bonnet nut to remove the valve stem. If the stem is seized, apply penetrating oil and wait 10 minutes before attempting removal again. Record the orientation of the parts as you remove them; taking photos at each step with a smartphone is highly recommended for reassembly reference.
## 4. Identify the Issue and Replace Faulty Components
Now that the faucet is open, you have access to the components responsible for regulating flow and sealing water. Inspect each part closely under good lighting.
### Common Culprits
1. **Worn Washers:** Found in compression faucets, the rubber washer at the end of the valve stem hardens and cracks over time, allowing water to seep past even when the tap is closed.
2. **Degraded O-Rings:** Small rubber rings sit in grooves within the faucet body. They swell or shrink with age, breaking the seal.
3. **Corroded Seats:** The metal surface where the washer presses down can develop pits or grooves, preventing a tight seal even with a new washer.
4. **Worn Cartridges:** In cartridge systems, plastic components inside the cylinder wear down, causing misalignment of hot and cold channels.
5. **Loose Components:** Sometimes the leak is simply due to a retaining clip vibrating loose or insufficient torque on the assembly.
### Inspection and Cleaning
Clean all metal surfaces of scale buildup using white vinegar or a specialized descaler. A soft brush can remove grime without scratching. Measure old parts against your shopping list or compare them to images online to ensure accurate replacements. Do not assume compatibility; buy the exact replacement part number if possible.
### Swapping Out Broken Pieces
Install the new O-rings or washers carefully. Apply a thin layer of plumber’s grease to lubricate rubber parts and prevent friction burns during operation. If replacing a cartridge, align the tabs or pins correctly before sliding it back into place. Ensure any screws are tightened securely but do not crush plastic components with excessive force. Remember, the goal is a functional seal, not a vice-grip hold.
## 5. Reassemble the Faucet and Test for Leaks
Reassembly is essentially the reverse of disassembly, but precision matters more this time to avoid introducing new leaks.
### Putting It Back Together
Follow your photo references from the disassembly phase. Ensure all gaskets are seated correctly. If using plumber’s putty, roll a snake along the underside of the faucet base before setting it onto the sink deck. Tighten mounting nuts under the sink evenly to distribute pressure. Connect the supply lines to the shutoff valves securely using Teflon tape on the threads if necessary.
### Restoring the Water Supply
Slowly turn the shutoff valves back to the open position. Watch for immediate spraying, which indicates a connection error. Listen for hissing sounds indicating trapped air. It is normal to hear bubbling as air escapes; let the system settle for a few minutes.
### Final Verification
Run the faucet through full hot and cold cycles. Observe closely:
- Check the spout for persistent dripping after closing.
- Inspect the handle base for moisture ingress.
- Examine the connection points under the sink for any signs of weeping.
If leaks persist, tighten connections incrementally or re-check the O-ring seating. A final test over several hours helps confirm long-term stability. If the drip continues, it may indicate a deeper issue requiring professional assessment.
## Bonus Section: Preventing Future Leaks and Maintenance Tips
While repairing a leak is satisfying, proactive maintenance extends the life of your fixtures and reduces the frequency of emergency repairs.
- **Avoid Over-Tightening:** When turning a faucet off, do not crank it to the absolute max. Close it firmly but do not apply crushing pressure to the internal components.
- **Regular Cleaning:** Mineral buildup from hard water accelerates wear. Clean aerators periodically to maintain consistent flow and prevent pressure imbalances.
- **Lubrication:** Apply a drop of silicone grease to O-rings and moving parts once a year to keep seals pliable.
- **Monitor Pressure:** Excessively high household water pressure can stress seals. If pressure exceeds 80 PSI, install a pressure regulator.
## Conclusion: Empowerment Through DIY
Fixing a leaking faucet is a tangible way to exercise self-reliance and protect your home from unnecessary damage. With the right tools, patience, and the knowledge provided in this guide, what once seemed like a complex plumbing crisis becomes a manageable task. You save money on service calls, reduce water waste, and gain a deeper understanding of your home’s infrastructure. Should the issue prove beyond your reach, knowing the basic mechanics allows you to communicate effectively with professionals if needed. Keep this guide handy, and remember: a quiet kitchen is always worth the effort of fixing.
## Frequently Asked Questions (FAQ)
**Q: How long should a faucet last before needing repair?**
A: Most faucets last 10 to 15 years. Signs of failure include drips, low water pressure, or difficulty adjusting temperature.
**Q: Can I fix a leaking faucet without turning off the water?**
A: Absolutely not. Attempting this risks severe flooding and electrical hazards if tools contact live wires.
**Q: What if I can’t find a replacement part?**
A: Take the old part to a hardware store for comparison or order online using the brand name and model number printed on the fixture.
**Q: Does fixing a faucet void the warranty?**
A: Generally, no. However, forcing broken components may. Always consult the manufacturer guidelines first.
Comments

FirstTimeHomeowner
Made a mess though lol. Remember to use towels everywhere when removing pieces!
👍 24👎 0

ToolGuy_Tom
Used an adjustable wrench but maybe a box end wrench fits better depending on type.
👍 1👎 0
MomOf3Boys
Super helpful! Took me about 20 mins total. Thanks!
👍 0👎 0

RustyPipe
Still dripping slightly after replacing washers. Might need a whole new cartridge tho.
👍 20👎 0

FixItFred
Pro tip: grab a small flashlight for step 1. Hard to see inside the cabinet otherwise.
👍 11👎 0

SarahJ_Home
Quick question... what if I can't find the shutoff valves under the sink?
👍 19👎 0
DIY_Dave99
Saved me a ton on plumbing fees. Step 3 was tricky but instructions made it clear.
👍 28👎 0