Step-by-Step Guide to Fixing a Leaky Faucet
DIY Plumbing Solutions for Every Homeowner
Introduction to Fixing a Leaky Faucet
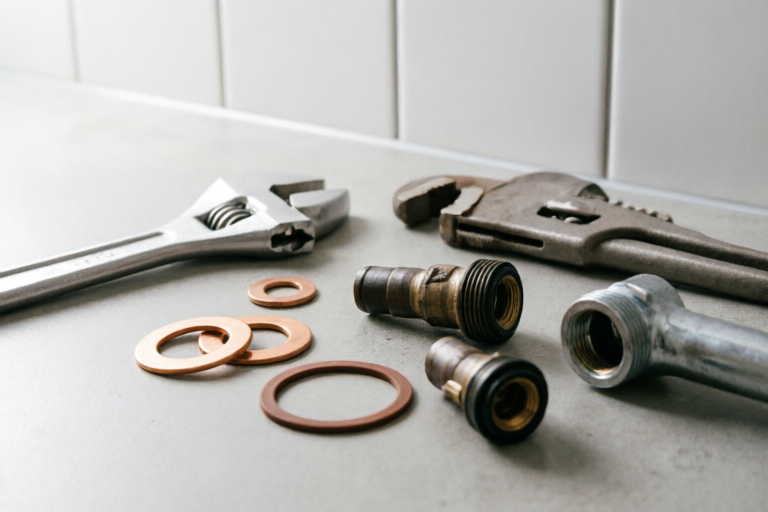
A leaking faucet can be more than just an annoyance; it can lead to significant water waste and increased utility bills. Promptly addressing faucet leaks is important not only for saving money but also for preventing further damage to your plumbing system. Common causes of leaks include worn-out washers, damaged O-rings, or misaligned parts. Before diving into the repair process, gather the necessary tools and materials such as adjustable wrenches, screwdrivers, pliers, replacement washers, O-rings, and sealant.
Identifying the Type of Faucet
There are several types of faucets, including compression, ball, cartridge, and ceramic disk. Each type requires different repair techniques. To identify your specific faucet type, look at the handle and internal mechanism. Compression faucets have visible nuts and screws, while ball and cartridge faucets have a single handle. Ceramic disk faucets have a smooth handle with no visible hardware. Knowing the faucet type is crucial for effective repairs, as it determines which parts need replacing and how they should be installed.
Preparing for the Repair
Before starting the repair, turn off the water supply to the faucet. Place towels around the sink area to catch any drips or spills. Remove the handle and trim to access the internal parts. This step is essential for ensuring a clean workspace and preventing any accidental water damage.
Diagnosing the Leak
To diagnose the leak, start by checking for worn-out washers or seals. These are often the culprits behind dripping faucets. Inspect O-rings and other rubber components for signs of wear or damage. Misaligned or damaged parts can also cause leaks. Use a flashlight to thoroughly examine the internal parts and identify any issues.
Replacing Faulty Parts
Once you've identified the faulty parts, follow these detailed steps to replace them:
- Worn-out Washers or Seals: Use a wrench to remove the nut holding the stem in place. Carefully pull out the old washer and replace it with a new one. Ensure the new washer fits snugly before tightening the nut back into place.
- O-rings and Other Rubber Components: Gently pry out the old O-ring using a flathead screwdriver. Insert the new O-ring and make sure it sits properly within the groove. Apply a small amount of lubricant to the O-ring to ensure smooth operation.
- Reassembling the Faucet: Once all faulty parts have been replaced, carefully reassemble the faucet. Tighten all screws and nuts securely to prevent any further leaks. Double-check that all parts are aligned correctly before proceeding.
Final Checks and Testing
After completing the repair, ensure all parts are securely tightened. Turn on the water supply and check for leaks. If the faucet still leaks, double-check the installation of the new parts and tighten any loose connections. Additional tips for maintaining your faucet and preventing future leaks include regularly cleaning the aerator, checking for mineral buildup, and applying lubricant to moving parts.
Conclusion
This step-by-step guide covers everything you need to know to fix a leaky faucet. From identifying the type of faucet to diagnosing the leak and replacing faulty parts, you can now confidently tackle this common plumbing issue. Encourage DIY enthusiasts to take on small plumbing repairs, as it can save time and money. However, if the problem persists or if you're unsure about the repair process, it's best to call a professional plumber for assistance.
Comments

After replacing the washer, I still had a leak. Any advice?

I usually call a pro, but this saved me some money. Thanks!

The section on identifying the faucet type was super useful. Made the rest easier.

This was my first time fixing a faucet. A bit tricky at first but I got it done. Good job!

Really appreciate the tip about placing towels around the sink. Prevented a mess!

I replaced the O-ring and it stopped leaking immediately. Super helpful tutorial!
Great guide! Quick question though, what do I do if I can't find the exact washer size?

Worked like a charm! Finally fixed that annoying drip in the kitchen. Thanks for the clear steps.